
Monday, November 5, 2012
Sunday, September 2, 2012
Labyrinth Finished
We finished the labyrinth. It took several-ish hours over a few days and cost all of $12.00 for the rocks. It's a seven path labyrinth, and walking the entire thing one way is about 300 feet of path.

It was pretty simple to do and didn't take as much space as I thought it would. We started with a flat and weed free spot in the garden that was about 25' x 25'. We marked the design by scratching it in with a stick using this plan ... and made our paths about a foot wide.

And then we lined it all with sandstone, which was really inexpensive and quite light and easy to work with.

Tuesday, July 17, 2012
Building a Labyrinth ...


I'm using this pattern here ... and it's much easier than I thought it would be. Labyrinthos is a website I found very helpful in figuring out how to do this project.
Monday, July 16, 2012
Sunday, July 15, 2012
Impressions

impress: 1325–75; ME <>impressus ptp. of imprimere to press into or upon, impress, equiv. to im- + pressus ptp. of premere (comb. form -primere) to press
to press (a thing) into or on something.
to produce (a mark, figure, etc.) by pressure; stamp; imprint:
to apply with pressure, so as to leave a mark.
I love art journals. Or, rather, I love the idea of art journals. I've never been able to keep one. I get a few pages in and mess up a page or look back and want to change things around. But I need a place to put sketches and ideas ... So, this is a flexible art journal that can be added to and changed at any time.
The covers of this journal are made of 1/8 inch thick, double sided masonite. I like this as a foundation for small paintings and it's thin enough to work for covers, about the same thickness as book board and very smooth and sturdy. I've cut two pieces of this to approximately 5 x 7 in and drilled three holes in both to fit rings.
I covered most of the masonite with a thin coat of light modeling paste. This will hold impressions made with stamps or anything else. The depth of the stamp will determine how thick the modeling paste should be.
 After letting this dry for about fifteen minutes or so, until it was just starting to harden on the surface, I used rubber and metal stamps dipped in water to stamp into the paste. Here, I've made this a quite subtle effect. But any stamp or any size can be used and thicker or thinner layers of paste.
Once dry, I sanded the impressed modeling paste and painted a few thin washes of magenta and turquoise, masking off the stripes with tape.

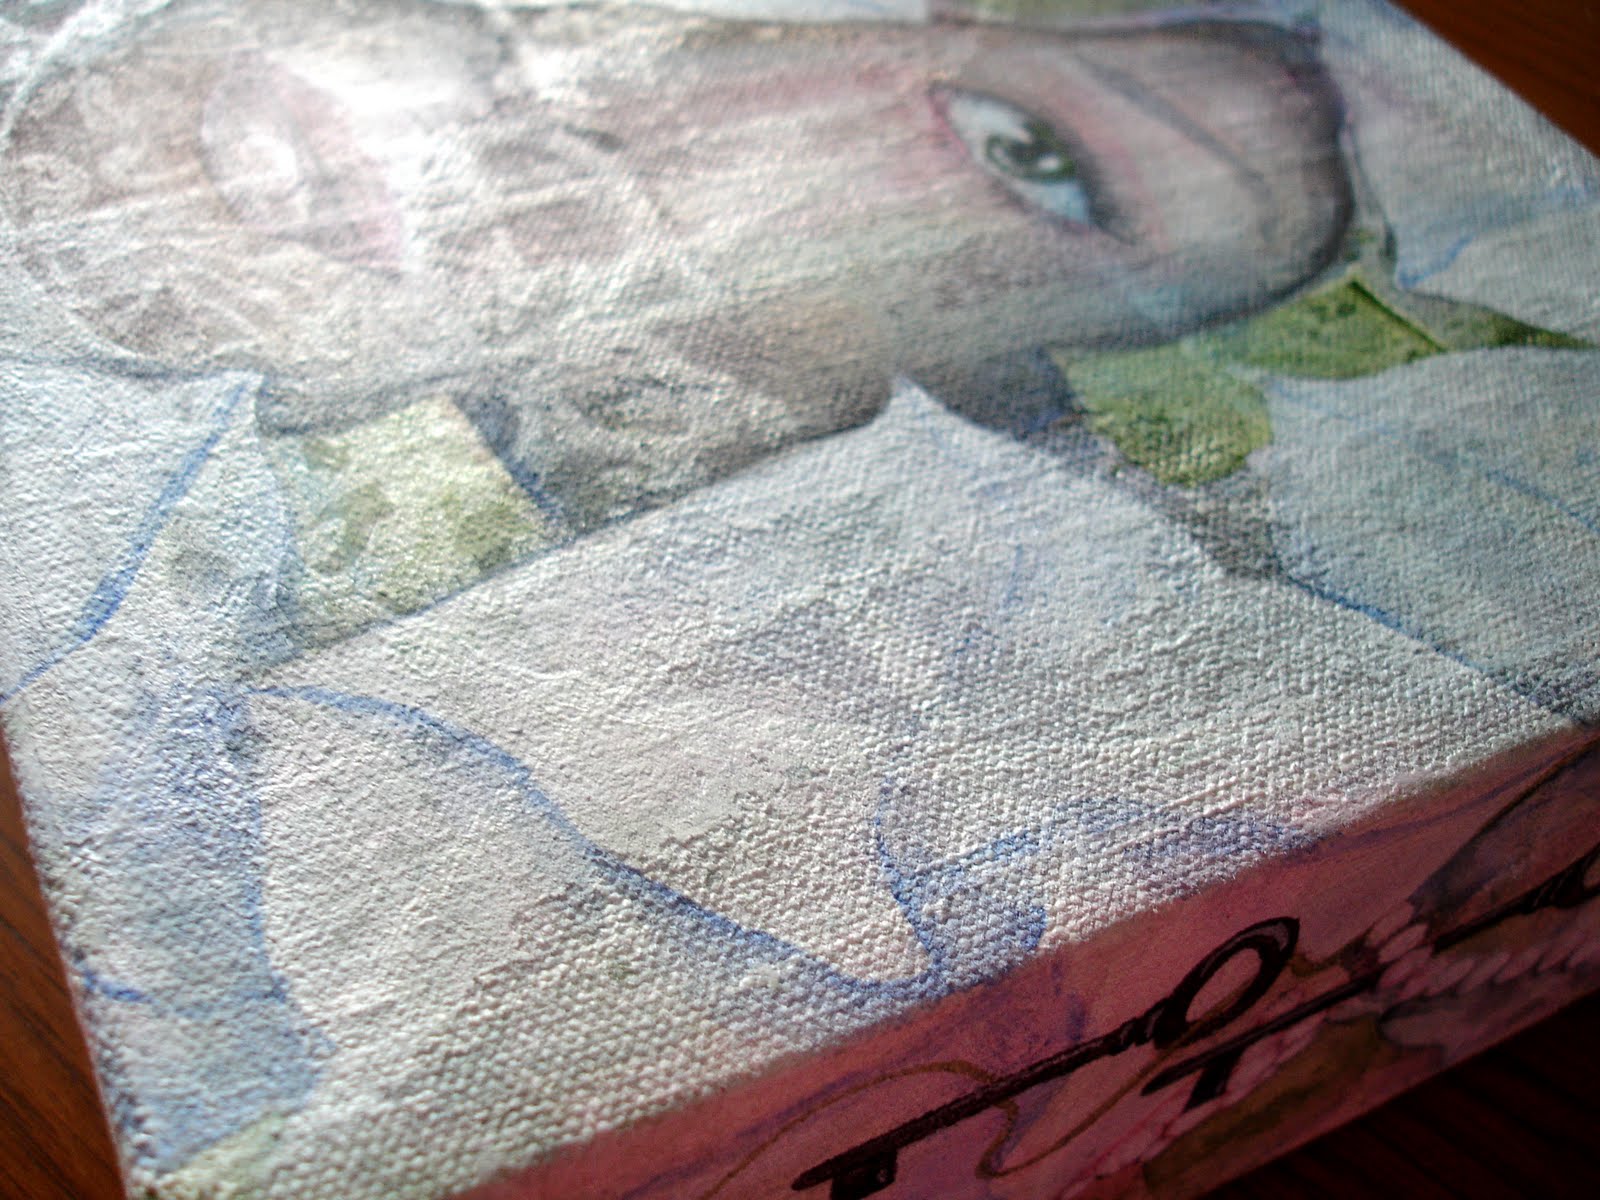
 On a small, stretched canvas, the effect is more obvious because I've used larger stamps and a thicker layer of paste. The technique is the same ... I used a palette knife to put on a thin coat of modeling paste (which will also act as a resist), allowed it to dry for fifteen minutes or so, then used stamps dipped in water.

Once fully dry, I sanded lightly and did a thin wash with quinacridone magenta.

Added some lime green stripes ...

... and a silk screened moonflower.

I use this technique on large canvases to add text ... and {imperfection} makes it unique.
to press (a thing) into or on something.
to produce (a mark, figure, etc.) by pressure; stamp; imprint:
to apply with pressure, so as to leave a mark.
I love art journals. Or, rather, I love the idea of art journals. I've never been able to keep one. I get a few pages in and mess up a page or look back and want to change things around. But I need a place to put sketches and ideas ... So, this is a flexible art journal that can be added to and changed at any time.
The covers of this journal are made of 1/8 inch thick, double sided masonite. I like this as a foundation for small paintings and it's thin enough to work for covers, about the same thickness as book board and very smooth and sturdy. I've cut two pieces of this to approximately 5 x 7 in and drilled three holes in both to fit rings.
I covered most of the masonite with a thin coat of light modeling paste. This will hold impressions made with stamps or anything else. The depth of the stamp will determine how thick the modeling paste should be.
After letting this dry for about fifteen minutes or so, until it was just starting to harden on the surface, I used rubber and metal stamps dipped in water to stamp into the paste. Here, I've made this a quite subtle effect. But any stamp or any size can be used and thicker or thinner layers of paste.Once dry, I sanded the impressed modeling paste and painted a few thin washes of magenta and turquoise, masking off the stripes with tape.
On a small, stretched canvas, the effect is more obvious because I've used larger stamps and a thicker layer of paste. The technique is the same ... I used a palette knife to put on a thin coat of modeling paste (which will also act as a resist), allowed it to dry for fifteen minutes or so, then used stamps dipped in water.Once fully dry, I sanded lightly and did a thin wash with quinacridone magenta.
Added some lime green stripes ...
... and a silk screened moonflower.
I use this technique on large canvases to add text ... and {imperfection} makes it unique.

Wednesday, June 20, 2012
Keeping Backyard Chickens ... My Experience
My long journey to being vegan began, in part, by keeping chickens. Many years ago, I was living on about six acres in a rural area when I got the brilliant idea to get chickens. I devoted several months to reading about the care of chickens, and about keeping chickens for eggs. How hard could it be, right?
Well, we got about a dozen unsexed baby chicks (I wasn't comfortable with the sexed ones ... where did the baby roosters go, I wondered even then). They were a mix of Aracaunas and Barred Rocks. Three turned out to be baby roosters.
After about the first day, our chickens were already out of their ridiculously cute stage. Their legs got gangly, their fluff started shedding. And they pooped. A lot. In their food, in their water. Everywhere. Their quarters had to be cleaned and food and water replaced at least a few times a day. A more finicky person would have done it several times a day.
The whole operation smelled. Like chicken poo. Chicken poo is not a good smell.
So, lots of expensive supplies and food and box cleaning later, we had a group of adolescent chickens. They were pretty big, too. Not full sized, but close. They were ready to go outside. But it was still chilly. So, we spent several hundred dollars and built a coop (which also gets full of poo, by the way) and installed heat lights.
Then the roosters started fighting with each other, and before we realized it was serious, one killed another. That left two behind. Thankfully, for some reason the remaining two didn't mind each other too much at that point and didn’t feel the need to fight to the death.
We’d gotten the baby chicks in March and took care of them inside until late May when we relocated them to the newly built coop. They continued to poop. A lot. The 20’x30’ outside fenced area we’d thought would be enough for them was soon what seemed inches deep in poo. Seriously, until you see it, you can’t imagine how much poo a chicken will produce. It soaks into the ground and is impossible to get genuinely clean. And when it rains? You don't even want to know.
Chickens don’t start laying eggs until they’re several months old or even older. So, there weren’t many eggs that first summer. We continued feeding and watering … and shoveling poo.
Winter came, and it was cold. We're in Michigan, so it can be below zero for days and weeks at a stretch. We had to put more heat lights inside to keep the chickens warm, and waterproof heat coils in their outside water buckets to keep their water from freezing.
Then, it was summer again. The chickens were big and beautiful. Chickens really are beautiful. The Aracaunas had markings like penguins, which prompted my seven year old daughter, Jessica, to name one “Penguin.” Jessica would carry Penguin around in her arms like a baby, and the chicken would lay her head on her shoulder.The Aracaunas were quite friendly. The Barred Rocks, not so much. But they all had different personalities and their own individual likes and dislikes.
When Penguin got an infection in her foot, it took several calls to find a vet who would take care of her. We all trudged off to the vet with the chicken. We didn’t need a box because Jessica carried her into the vet’s office and sat her on her lap. The vet lanced the infection and prescribed an antibiotic. We felt it was well worth the couple hundred dollars to make the chicken well. We did have to wrap her foot and keep her inside for about a week. There was more poo.
Finally, more than a year after we got them, our chickens started laying eggs reliably. They would start clucking and carrying on at sunrise. By noon, they would be in their nesting boxes. Finally, after several hours of clucking and pacing, the egg would come out.
The first egg I saw from one of our chickens, and many that came after, was covered with threads of mucus and blood. I couldn’t help but compare laying eggs every day to giving birth every day …
We still had two roosters. I worried about them fighting with each other. I didn’t have to worry long. One day, I went out to check on the chickens, and one of the roosters appeared to have exploded right there in the yard of the chicken coop. The rooster himself was gone, but there was a ring of bloody feathers left behind as a clue to his violent end. We had no idea what or who could have done that. I would later figure out it was a red tailed hawk, but not before we’d lost more chickens.
I’d always loved eggs for breakfast. One of my favorite childhood memories is of my dad making my sister and me breakfast, which always included fried eggs done over easy. But, after watching eggs actually coming out of the chickens, and seeing what effort it took and the blood …and seeing that it came out of a chicken … I lost my taste for eggs. It never really came back.
We realized the chickens were getting attacked by red tailed hawks about the time the poo in the coop yard reached critical mass. We just seemed to lose control and not be able to keep up with it. Our poo cup overflowed. And smelled.
Our neighbors were pretty good about it all, and we didn’t receive any actual complaints. But I’m sure they cursed us when we weren’t around.
So, between the hawks and the poo, we decided to let the chickens out. We did have six acres for them to roam, and we’d heard they’d eat bugs out of the garden. And they did eat the bugs … and everything else. In just a few days, every tomato in our garden had been eaten by the chickens. In just a few more days, everything else had at least a bite taken out.
At this point, we had a smelly enclosure and a decimated garden. We’d spent at least $1500, lost several chickens to fighting or predation, and I’d lost my taste for eggs. It was time to throw in the towel. The towel was probably covered in chicken poo anyway.
I found someone who had a small farm and also kept chickens and we gave her ours. It was a nice farm, but what happened when they stopped laying? What about if they got sick? I didn’t even know to ask.
I didn’t know a lot of things. I didn’t know that taking care of chickens was so much work and expense. I didn’t know hawks would attack them from the air. I didn’t know they would turn almost half an acre of garden into a barren dust bowl in just a few weeks.
Here’s what else I didn’t know. I didn’t know that chickens DO NOT naturally lay eggs nearly every day of the year. In nature, wild ducks and geese, for example, will lay several eggs over a period of several days, and then care for the eggs and the chicks that hatch. It will be several months or even a full year before they lay eggs again. If left alone, chickens do the same thing. They will lay several eggs and then they stop laying. Removing the eggs every day is what causes them to lay more … it’s not a natural thing. Leaving the eggs causes the chickens to get “broody,” which means they stop laying and will sit on their eggs. Many chicken breeds are advertised as “not broody.” That’s what that means. They’ve been bred to be less inclined to want to care for their eggs and will keep laying and laying and laying as long as their eggs are taken away.
I also didn’t know then that there was a whole world of vegan foods that were better than anything I’d eaten up to that point. And that the memories I cherished were of my dad and not of the eggs he made us. And there are new memories to be made with foods that don’t require such a sacrifice on so many levels.
I’m vegan for ethical reasons. I think it’s right and good to leave other animals alone as much as possible, and to help them when I can. But, I also learned that exploiting animals is hard work, and messy, and the return is far less than the input.
Just from a purely practical standpoint, keeping chickens is insane. I honestly can’t think of a better word to describe it. We garden about three quarters of an acre now. From that, we’ll get literally thousands of pounds of food. There will be enough to feed us much of the year, enough to sell some surplus, and enough to donate quite a bit to a local food bank. We use mostly organic methods (and are moving to veganic), so at the end of the year, our soil is in better shape than in the beginning. It’s win-win-win-win.
We do that … grow thousands of pounds of food … for less than the cost and not all that much more work than keeping a dozen chickens. The net gain of gardening plants is astronomical compared to trying to raise animals. Any backyard gardener, either rural or urban, will get a huge return on the seeds or plants they grow. Animals are expensive and lots and lots of work. I can only guess that it’s extreme naiveté that causes people to choose animals over plants. Certainly, that was the case with us.
I was inspired to write this after reading a blog post by historian and vegan James McWilliams (his blog is HERE). He writes often about the urban farming and locavore movements. (I’ve been inspired by his posts before … HERE). And I think this is a conversation worth having. No matter how one does the math, under normal conditions, keeping animals results in a net loss. It requires more food, energy, effort, time, labor, space, and everything else, than producing plant foods. And that’s BEFORE any animals are exploited or killed.
The locavore movement is often, and with good reason, accused of romanticizing the keeping and killing of animals. But growing plants can be romanticized, too. There is little more exciting than planting a seed the size of a grain of sand and coming back in a few weeks or months and getting mounds and mounds of food.
It’s like magic.
This is my dinner … straight from the garden.

Tuesday, May 22, 2012
In the Pacman Garden
Wednesday, May 16, 2012
Treadmill Desk
It's made of a few pieces of PVC and a board and fits over the treadmill. It works even better now that I use it with a laptop ...
I like it!


Monday, April 23, 2012
More About Heinz
Here's a bit of what I was able to learn about Heinz so far ...
Heinz Wertheim was born in Bremke, Germany, on June 26th 1921. He was a shoemaker and married Ruth Zeilnziger. They were deported together to the transit camp, Westerbork, near Assen, in the Netherlands.
Heinz and Ruth had a baby, Paul Freidrich, who was born in Westerbork on May 6, 1943. The postcard is dated May 5th, but was postmarked on May 8th. I imagine it likely that the money he was sending the thank you note for was sent to Heinz to help with the baby.
Baby Paul died six weeks later, on Heinz' 22nd birthday.
The Community Joods Monument site also has two photos of Heinz.
This is what he looked like ...
From Westerbork, Heinz and Ruth were sent together to Auschwitz in 1943. Heinz went on to Monowitz, a subcamp of Auschwitz which provided slave labor to the IG Farben company.
Heinz died at Monowitz, December 3, 1943.
Heinz Wertheim was born in Bremke, Germany, on June 26th 1921. He was a shoemaker and married Ruth Zeilnziger. They were deported together to the transit camp, Westerbork, near Assen, in the Netherlands.
Heinz and Ruth had a baby, Paul Freidrich, who was born in Westerbork on May 6, 1943. The postcard is dated May 5th, but was postmarked on May 8th. I imagine it likely that the money he was sending the thank you note for was sent to Heinz to help with the baby.
Baby Paul died six weeks later, on Heinz' 22nd birthday.
Paul Friedrich Wertheim died on 26 June 1943 in Westerbork transit camp and he was cremated on 28 June 1943. The urn with his ashes was placed on the Jewish cemetry in Diemen on field U, row 10, grave nr. 6.
Register van joden die in het kamp Westerbork zijn gecremeerd, 1943-1944; archief van de gemeente Westerbork, opgenomen in het archief van de gemeente Midden-Drenthe te Beilen, inv. n 3789
from http://www.communityjoodsmonument.nl/
The Community Joods Monument site also has two photos of Heinz.
This is what he looked like ...
 |
Nationaal Archief, Rijksvreemdelingendienst, inv. nr. 891 |
 |
Copyright: Yad Vashem, Jeruzalem |
Heinz died at Monowitz, December 3, 1943.
 |
| Monowitz |
Saturday, April 21, 2012
An Update on Heinz and Ruth
I was able to contact the family of a woman who I though may have been the wife of Heinz Wertheim.
Despite the extremely unusual last/maiden name (I could find only one Ruth Wertheim in the US), and that the two women have similar birth dates, are from Germany, went through Westerbork, and survived the Holocaust, they are not the same people.
One of my next options is to contact Yad Vashem. I'm pretty sure the right way to look is to Israel, which is where the records say Ruth emigrated in the late 1940s.
As well, the family of the other woman is also being very helpful (after all, they share a somewhat unique last name with Heinz's wife). I'll be talking with them further and may find out more. It's actually been quite a powerful experience to be able to hear some of this other family's experience. Theirs is also a story of magnificent loss, survival, and triumph.
I just wanted to give an update. Things are rarely as simple or cut and dried as we would like, and certainly to locate someone 65 years later may not be easy. I will continue to look for Ruth and/or any of her relatives or descendants, or any relatives of Heinz.
Friday, April 20, 2012
The Name on the Postcard was Heinz
And the story continues ...
I emailed back and forth with a very helpful researcher from Westerbork, who couldn't find any record of a Henry Wertheim ... so I sent a copy of the postcard, and it turns out that the first name on the card is actually Heinz.
They were able to tell me that Heinz Wertheim was a shoemaker apprentice who was born on June 26th, 1921 in Bremke, Germany. He married a Dutch girl named, Ruth Sara*, and they lived in the Netherlands and were sent together to Westerbork. They were so young. He would have been 22 and and she just 21.
In Westerbork, on May 6, 1943, they had a baby and named him Paul Freidrich.
The baby died six weeks later.
I just noticed that the postcard was written on May 5th 1943, the day before the baby was born, and postmarked May 8th, two days after. Perhaps they got money from someone outside Westerbork because they were expecting a baby (the postcard said, "Many thanks for the money you sent.") ... and I imagine Heinz wrote the card on the 5th, then was busy with the new baby and didn't get a chance to mail the card until the 8th.
Shortly after the baby died, on September 14, 1943, Heinz and Ruth were sent together to Auschwitz.
Heinz died at Monowitz, which was a labor camp at Auschwitz, on December 12, 1944, after surviving there for more than a year. He was 23. His wife, Ruth, survived Auschwitz and was sent to Ravensbruck and then Malchow, a subcamp of Ravensbruck. She survived the death marches from Ravensbruck before being liberated in Neustadt.

Thursday, April 19, 2012
A Postcard from Henry
*This is a story that started, for me, several years ago when I bought this postcard. I'd like to share how it's unfolded up to today ... This is how it begins.
"I have a suitcase full of these cards," the dealer said.

I bought it from an antiques dealer. It was a barely faded postcard, addressed from a man named Henry to Herbert Hirsh.
It had been sent on May 8, 1943 from Westerbork, a transit camp for Jews and others during World War II. Anne Frank and her family went through Westerbork on their way to Auschwitz.
All told, 107,000 people left Westerbork on trains destined for Auschwitz-Birkenau, Sobibór, Bergen-Belsen and Theresienstadt.
5,200 of them survived.

“Many thanks for the money you sent.” ~ Henry Werth
I’ve contacted Westerbork for information on Henry, to see what happened to him … and, perhaps, discover who he was.
Monday, March 19, 2012
Which Sugar is Vegan?

What to do about the sugar?
Some granulated cane sugar is filtered and whitened using bone charcoal. It doesn’t contain an animal product, but an animal product has been used in its making. In the view of some, this means it’s not vegan. And that’s technically correct.
It’s often suggested that organic sugars of various kinds be used instead of conventionally grown cane sugar. However, I don’t think this is any more vegan than sugar filtered through bone. Organic growing uses massive amounts of animal products, including blood meal, fish emulsion, various manures, ground up feathers, and, yes, even bone meal … which is, as the name suggests, ground up bones. I don’t believe a product grown with bones is any more vegan than one filtered through bones. In many ways, I’d say it’s less vegan.
Beet sugar, made from sugar beets, is also often suggested as a vegan sugar alternative. In recent years, 95% of beets grown for sugar have been genetically modified (GMO). Litigation this year that attempted to prohibit the growing of GMO beets was struck down. I currently live in Michigan, where lots of sugar beets and other GMO crops are grown. The fields, and any animals living there, are decimated by this kind of farming … not to mention the damage it does to the surrounding land and water. So, I don’t think beet sugar is all that “vegan” either, although it probably comes the closest.
When it comes down to the details, there really is no granulated or powdered sugar that’s entirely vegan. Each of them contributes to the death of animals in their own way, and none are substantially better than the others.
So, my feeling on sugar is like my feeling on books and magazines with pages sized with gelatin; I wish they were vegan, but they’re not. None of them are. So, I read many books and magazines, and occasionally, I buy a box of Oreos. Not often, but I don’t think doing so is any “less vegan” than buying another form of granulated sugar.
The best strategy, I think, is to simply avoid processed sugar as much as possible and use it as an occasional food. Not only is it unhealthy for us, but it’s also not healthy for ~ or kind to ~ our fellow earthlings, in a myriad of ways.
When a less processed sweetener is desired, dates and date paste are fabulous, as are bananas. Coconut aminos, date palm sugar, turbinado, etc., are also wonderful. Stevia works well in some cases, as does agave.
Next year, I’m going to grow some veganic sugar beets and see if I can make my own sugar with them. That should be an interesting project! If it turns out, I’ll let you know!
Monday, February 27, 2012
Resist

resist: 1325–75; ME resisten (v.) < L resistere to remain standing,
a substance that prevents or inhibits some effect from taking place
I really like a textured looking background, but I paint in very thin washes, which isn't compatible with the thicker and more opaque layers that are usually seen in mixed media. Putting down some kind of resist before I add color helps create some dimension and interest.
I start with a very lightly gessoed canvas that is still quite porous. Too much gesso will make the canvas too slick and not porous enough. I also experimented on a lightly gessoed Moleskine page, and bare watercolor paper.
For the resist in my projects today, I used a regular glossy gel medium, an ultra heavy glossy gel medium, and modeling paste. Anything that makes a mark that is less porous than the canvas or paper will work as a resist.

There are several different ways to put the resist down. Any kind of handmade or rubber stamp lightly coated with gloss medium can be pressed into the canvas or paper. A palette knife can be used to spread an imperfect coat of modeling paste in places on the canvas ...

Using an old brush, glossy gel medium can be flicked in spots at random over the canvas.

Screens, stencils, silk screens and anything else with an open pattern can be used to press modeling paste or gel medium through.

Once the different resists are down, I add thin washes of acrylic paint. For this project, I wanted a subtle effect with the resists, so I made them fairly thin. The more porous canvas will soak up more pigment than the resist leaving an interesting design.


I wanted pink stripes and used masking tape as something of a resist. When using tape, the paint can't be too watery, otherwise it will seep under the edges of the taper. That can actually be an interesting effect, but I didn't want that here so went with a drier paint ... in pink!
 My pink is made of Liquitex Quinacridone Magenta mixed with Titanum White.
I decided to use a silk screened image over the stripes ...

and added some moonflowers ...

This works the best on canvas, for me anyway. The effect is usually more subtle on paper.


Products used ...
Liquitex
- Ultra Heavy Gel Medium, glossy
- Gel Medium, glossy
- Modeling Paste, light
- Vivid Lime Green
- Yellow Light Hansa
- Quinacridone Magenta
- Titanium White
- Cobalt Teal
- Turquoise Deep
- Sap Green
Tuesday, February 21, 2012
Progress ... WIPs

progress
a movement toward a goal
going on; under way; being done; happening:
to grow or develop, as in complexity, scope, or severity; advance
Works in progress ...
"sight" 10" x 10" x 2.5"


"she's a rainbow" 12" x 12" x 2"


7" x 7" x 2.5"


"shh" ... 12" x 12" x 2"


24" x 24" x 2.5"

24" x 24" x 2.5"

"allie and ledger - life size" 24" x 24" x 2.5"


Subscribe to:
Posts (Atom)